Replacing the memory (RAM) on a notebook computer.
Locating the memory modules
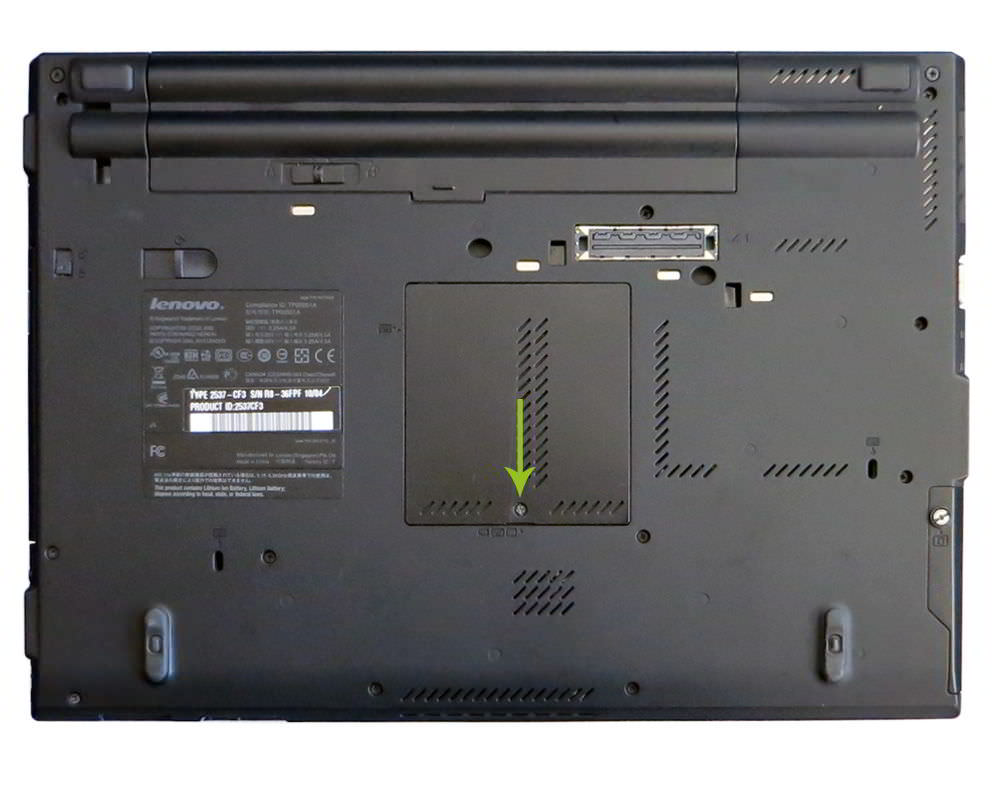
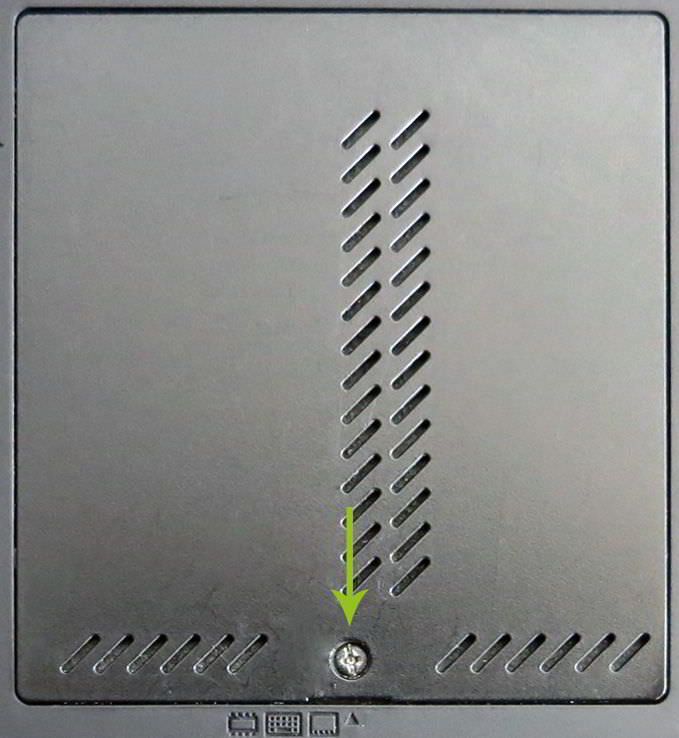
To first determine where exactly the memory modules are installed, place your notebook with the bottom facing up on a flat work surface. Most devices have one or more so-called service hatches, which provide access to many components. Many manufacturers mark these service hatches with small symbols that indicate which component is located under each hatch. If you cannot find such markings, you will need to consult the manual or look under each hatch.
Preparations
Before you begin the replacement, you should ground yourself. Static discharges can damage various components, especially the memory, which is very sensitive. To ground yourself, you can touch a piece of bare metal on the radiator or the grounding contact in the socket. This discharge is only for the moment, but it is usually sufficient.
Removing the memory
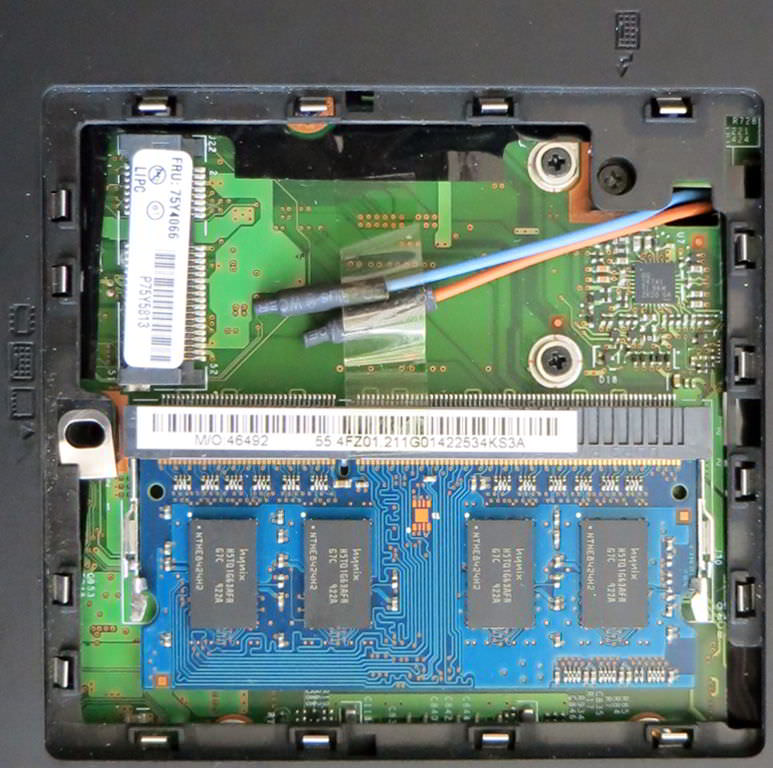
After opening the service hatch, you will usually find two slots for memory modules. You can remove a module by lightly pressing the two brackets on the right and left outward. The RAM module should then tilt slightly forward, making it easy to remove.
Inserting additional memory modules
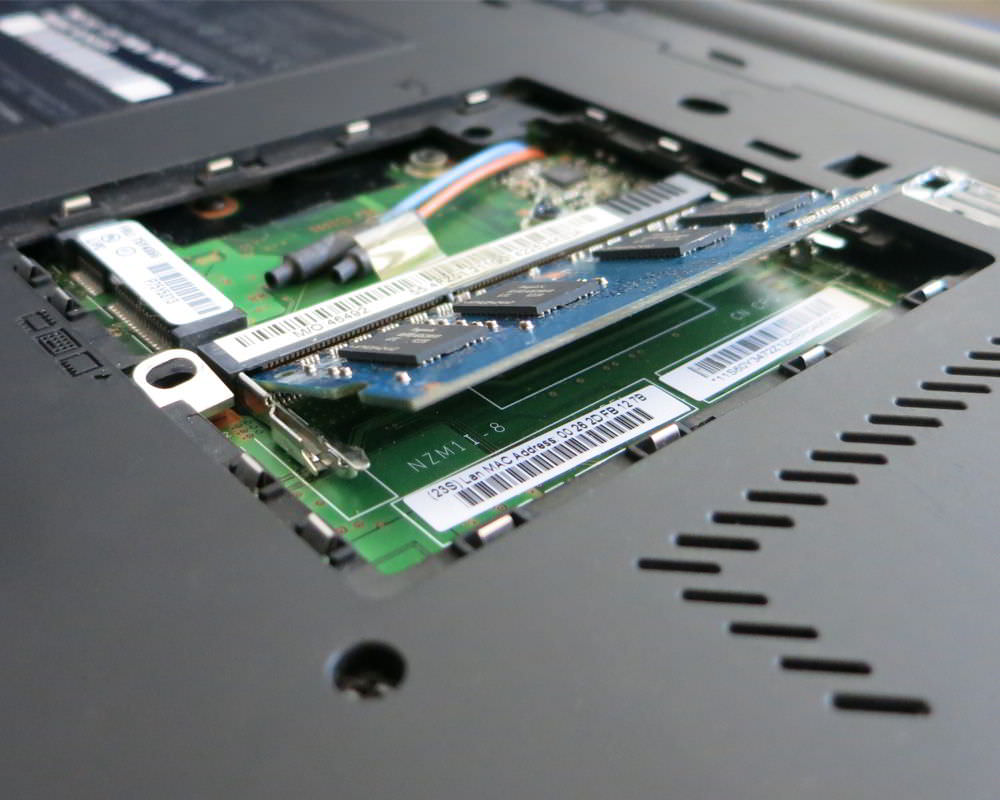
The insertion process is essentially the reverse. Insert the RAM module slightly diagonally into the slot; this should not require any force. If light pressure is not enough, try changing the angle or double-checking the module type. If the memory is now diagonally seated in the slot (see image), you can simply push the module down. Then the brackets should snap into place, and you can reattach the service hatch.
Checking the memory after upgrading
Whether everything worked as planned can be easily checked in the BIOS or under Windows by looking at the memory capacity. You do not need to perform a complete memory test here, as this is only necessary if you experience problems with your computer.